Tuesday 26 February 2013

'Chicken Itame' - Chicken and Coconut Soup

When ever I go to Wagamama's, the dish that I order nearly every time has to be the 'Chicken Itame Soup.' That may sound unadventurous to you, but the delicious mix of mouthwatering, light, spicy flavours literally leave me begging for more. So 'more' is what Jossi and I decided to create.

We had a sneaky look at the Wagamama's website to try and work out what we could put together to get a similar result. I have to admit, ours didn't turn out quite the same, but it definitely captured the 'essence' of the dish and was a pretty good home made attempt!

Ingredients:
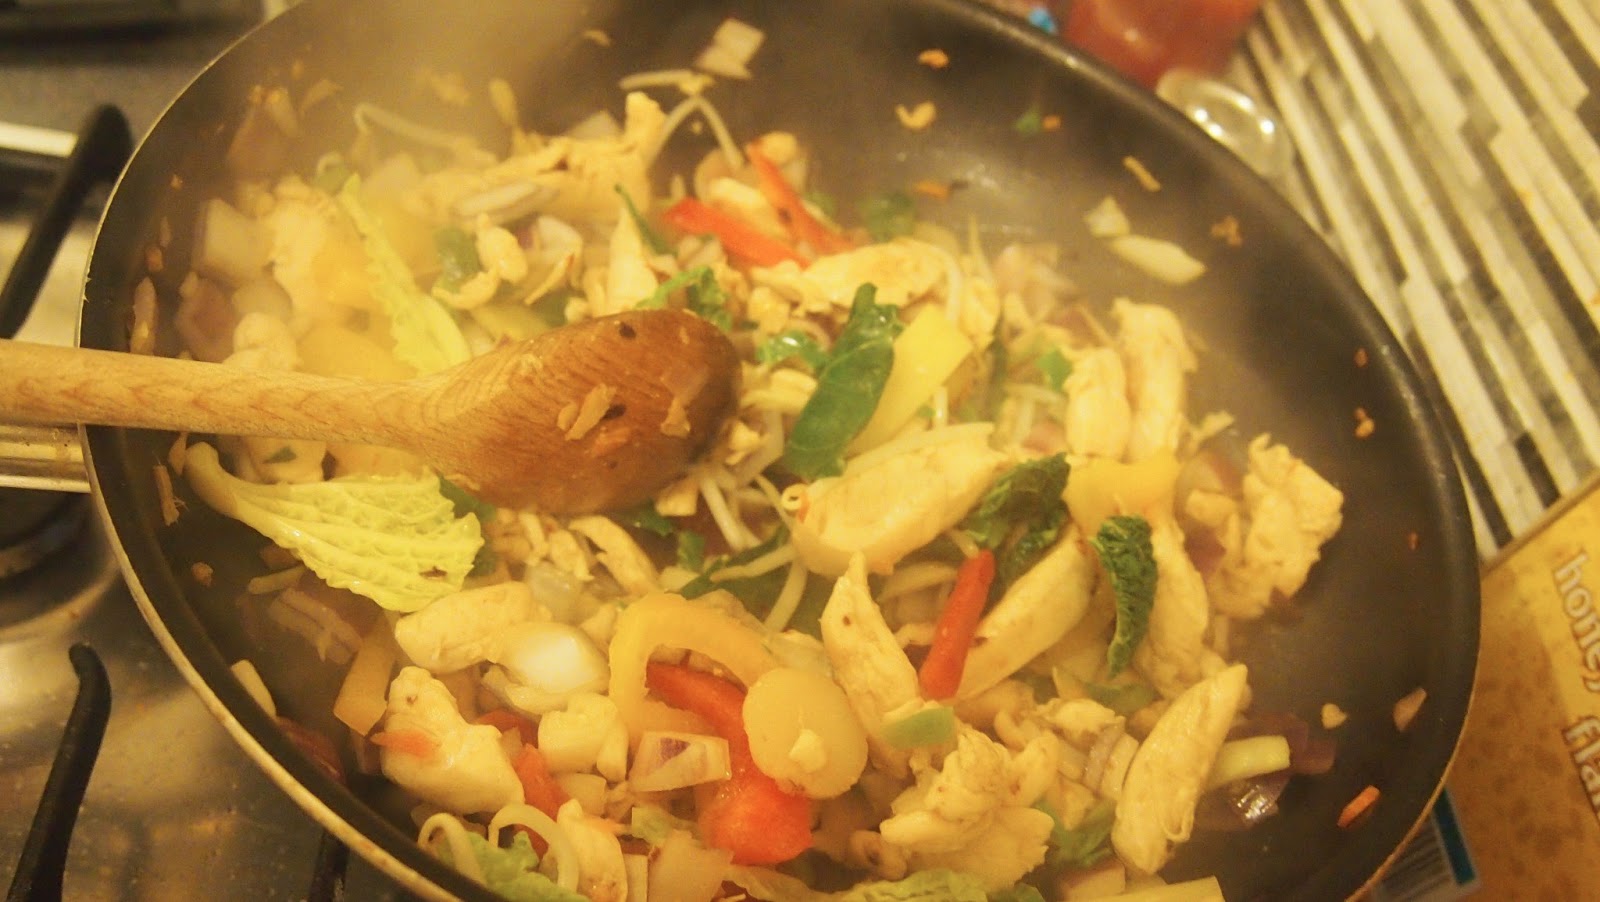
chopped chicken breast
noodles
garlic
ginger
lemongrass (we used a teaspoon of the powdered type, but the real stuff would be better)
can of coconut milk
one chili (we also threw in some chili flakes)
a red onion
stir fry veg- we used bean sprouts, pepper, bamboo shoots and cabbage
a couple of cups of water
a squeeze of lemon or lime
a twist of salt and pepper


Chop all of your ingredients and heat up a little oil in your pan. Sizzle the chili, garlic and ginger for half a minute of so and then add your chicken. When your chicken is mostly cooked through, add the rest of your veg and stir fry together.


Then simply add your can of coconut milk, noodles (we used fresh ones, but if you use the dried type, cook them first!) and a couple of cups of water to your stir fry and let this simmer. Pour in your lemon juice and sprinkle in the salt and pepper. Joss and I also added a few more pinches of lemon grass here as well.


Leave on the heat for 10 or 15mins just to let the flavours infuse through and there we are, one delicious (almost) restaurant quality dish, made by you!


P.S. I think this would be amazing if you added a teaspoon of thai green curry paste to your veg- if you do, tell us how it tastes!

Monday 25 February 2013

Peppermint Creams

Peppermint creams always remind me of my school days. The first time I ever tried one was in a physics class. We were learning something about waves traveling through space when a girl passed a little sugary disk under the desk and into my waiting palm. "They're home made," I remember her whispering as I popped it into my mouth just as the teacher turned around to glare at us. "What's that in your mouth?" I remember him snapping and I replied "Nothing!" quite truthfully since the minty disk had already dissolved on my tongue.

Probably because of this, these little treats have always left me feeling naughty. Nowadays, the naughtiness comes from knowing just how much sugar is in them. Then again, everyone needs a treat now and then and if you have just one or two...


So how do I make them? They really take no time at all (and even less if you don't have to do all the mixing by hand!) To start with, you will need:
450g of icing sugar (plus another 50 or so grams to sprinkle)
juice of half a lemon
one egg white
two teaspoons of peppermint flavouring
a little chocolate sauce (or chocolate) for spattering


Start by whisking up your egg white until it becomes stiff- when done properly, you should be able to tip the bowl over your head and nothing will come out!

Then beat in your lemon juice, flavouring and icing sugar. The mixture will now be quite hard to mix as it becomes a thick paste.


Next, you need to roll out your paste. It's very sticky, so sprinkle some icing sugar over your work surface and rolling pin. Then roll out your paste, making it as thin as possible.


Now all you need to do is cut out your disks. You can make them any shape, but we went for the conventional round. However, we did this the not-so-conventional way- using shot glasses as our cookie cutter...


(Nearly there!) Lay your creams out on a board or baking tray. Then get your sauce (we used M&S fudge sauce which is delicious!), heat it up a little so it's quite runny and then splatter it over your creams. The darker (so more bitter) the chocolate in the sauce, the better contrast it'll be to the sweetness of the creams. (If you don't have any sauce,  just melt some chocolate instead.) Lastly, pop your creams in the fridge to set for a few hours.


There we are, naughtiness on a platter! 


Future Cheer!

One of the best things you can do at university is get involved with a society- I play lacrosse and more recently, I've taken up cheer!

We've all seen the movies- the inescapable mix of catty girls, death defying stunts and romances with a quarter back. I have to say my experience with cheer hasn't quite been this. The girls have been amongst some of the nicest I've met, the stunts are definitely tricky but when you fall, someone (nearly) always catches you and well, there's been some mingling with the American Football lot but there's definitely no obligation to bag yourself a player!


(Sorry this isn't the best of pictures!)


As you may or may not know, cheerleading isn't a widely practiced sport in the UK. The majority of people in my squad (myself included) had never done it before and so were very excited to try it out when we realised we could take it up at university (although we all admitted the super cute uniform was what attracted us in the first place).

Most universities have a squad and compete in competitions, which is exactly what mine did this weekend. Luckily for me, my squad doesn't conduct tryouts so anyone can join but other universities however aren't always quite so nice!

Anyway, at 5am on Sunday morning we all met in our uniform and dragged ourselves onto the coach to Loughborough so we could compete at Future Cheer. We were all pretty nervous but very excited- this was the first time the sqaud had ever competed in this particular competition and for many of us, our first competition ever!


We were competing at level two, which means we could only put certain moves into our routine as befitting our standard. We had to perform twice which was exhausting and absolutely terrifying. Despite this, getting out on to the floor and cheering for a room packed with spectators and other squads was totally and utterly exhilarating.


Our hours of practice (we'd been cheering for 3 hours a day, 5 days a week over the last two weeks!)  pulled off and our performance ranked 19th over all. Although not the most amazing placing ever, we were all very proud at being in the top 20 (especially since we'd been convinced we'd be last when we saw all the other much more polished squads perform!) and are already looking forwards to coming back next year!


Us about to perform!


I'd definitely recommend giving cheer a go- it's great for confidence and personally, I have met some fantastic people and have loved every minute of it!

Thursday 21 February 2013

DIY Valentines

My boyfriend and I decided this Valentines, we'd have a crack at making presents for each other. I have to admit, I was pretty dubious about this to start with but surprisingly  it turned out to be really fun trying to guess what he could possibly be making, while panicking at my lack of arty skills.
I trawled the internet looking for ideas, but all the craft sites seemed to be suggesting overly girlish presents which I'm fairly sure no man would want to possess, let along treasure! In the end, I resorted back to my all time favourite blogger who made these delightfully fluffy owls! They're simple to make, not too girly (I don't think?) and oh so cute, so if you get the chance have a go and make one! I've already had requests from friends for more!


The production process was simple enough- it essentially involved making a stencil, cutting out your fabric and sewing on cute, goggly owl features! I used some pretty cotton I found on ebay and felt for the details.


As you can see, I cut a stencil out of paper and then cut two of the stencil shapes out of the fabric- one for the front and one for the back of the owl.


These were the colours I used.


I sewed on the features before joining the front and back of the owl together.


Sew the front and back together inside out. This way, all the stitching is invisible when you turn him back round the right way. 

Everybody meet Hoots! I filled him with rice, but you could simply fill him with soft toy stuffing if you fancy a squishier owl. 


Hoots went down very well with my boyfriend although I had quite a hard time giving him up-he's just too cute with those big round eyes! I especially love the fact that if you decided to fill your owl with rice, you can heat him up in the microwave and snuggle with him on nippy nights. I'd definitely suggest having a go at making one of your own!


Tuesday 19 February 2013

Steak Stir Fry

In case you haven't already guessed, Jossi and I are rather big fans of Asian food. In fact, even as students we have a tendency to pop out for dinner once a fortnight to various chinese and indian restaurants around the city. They're our guilty pleasure and after, we tend to waddle home stuffed to the brim and try very hard to forget that we promised we'd go to the gym the next morning.

More recently, as the work has piled on and we've started to take our sporting commitments a bit more seriously (rowing for Joss, cheerleading for me) we've found that we don't have enough time for the leisurely stroll into town and to sit down for two solid hours of gluttony. Instead, we've taken to cooking our own. So, on that note here's (another) dish that we sizzled up this weekend!

Supplies:
two frying beef steaks
honey
soy sauce
'Kikkoman sweet sauce for rice'
a handful or two of stir fry veg (the pack I had contained bean sprouts, carrot, lettuce and some bamboo shoots)
sesame seeds
one clove of garlic
a knob of ginger
a pinch of chili flakes
one lemon

a pinch of salt and pepper
a teaspoon of brown sugar
rice


Start by cooking your rice- pop a few handfuls in a saucepan, cover with water and bring to the boil.


While your rice is cooking, chop up your ingredients, heat some oil in your pan and toss in the sesame seeds followed by the chili flakes and garlic. Let this fizzle for a bit but be careful not to let anything burn. Then, making sure the heat isn't too high, add a generous splash of soy sauce and rice sauce, along with a squirt of honey and any remaining veg. Stir in the brown sugar.


When the veg has reduced a little,  add in your chopped frying steaks- personally I don't like beef too well done, but if you prefer it not to be pink, add yours in the same time as the veg.

 To finish, add your cooked rice to the pan and drizzle over the juice of one lemon (if you heat the lemon in the microwave for a few seconds, you get twice as much juice out of it). Stir this through and then you're done!


This dish is definitely not all that high on the prettiness scale, but it's moreishly good- we both finished the whole pan that night!


Unfortunately for me,  I'm going to have to go on a shop before I can cook this again since the soy sauce bottle fell out of the cupboard and onto my head this morning, smashing all over the floor- not a good start to the day!


Monday 18 February 2013

Sugar, Spice and All Things Rice

When I started this blog, I didn't intend to spend all my time writing about food, but as you may have guessed by now Jossi and I are rather obsessed by the stuff. There's nothing more satisfying than  putting together a whole bunch of raw ingredients, crossing your fingers and ending up with something finger lickingly good!

Anyway, this is something the pair of us rustled up at the weekend- enjoy!


What do you need?
a couple of chicken breasts
some red thai curry sauce (red thai curry paste and some coconut milk should do the same job)
peppers (I used about 3/4 of a yellow one in the end)
red onion
a tin of pineapple
a handful of cashew nuts
carrots
a large chili
garlic
ginger
a pinch of salt and pepper
rice


As you may have seen already, my quantities of ingredients are rarely exact- I tend to taste as I go along and add more as and when I think the dish needs it, Just remember that when you cook veg, it shrivels and reduces so you always end up with less than what you started with!


Start by putting a large pan on the hob and heating up a splash of oil. Finely chopping your garlic and toss it in the pan so it sizzles, then add your chicken, chopped into small pieces . Chop all your other veg and toss it in with the chicken along with the salt and pepper.


I just love how colourful this dish is!


When the chicken is cooked through, pour in your pineapple chunks and the cashews. Turn the heat down low- you don't want to simmer away all that lovely pineapple juice!


While the chicken and veg is cooking on a low heat, start cooking your rice in a separate saucepan. When this is done, pop it in the pan with your chicken and veg. Add a couple of spoonfuls of the red thai curry sauce. Stir through and you're done!


This dish is an explosion of taste and we quickly polished off half the pan before it'd even cooled, although do be careful as the chili makes it pretty hot- we were chasing each mouthful down with a glass of water!


Jossi sneakily tucking in already!


"Mars Bar Melts" v Mars Bar Cookies

Jossi and I have a long standing love affair (along it seems, with most of the blogging community) with Rose, AKA The Londoner. In case you're not already affiliated, she  blogs about food, fashion and life in general in a beautifully relatable way (even if you don't have quite the same lifestyle as her) and has inspired many (myself included) to take up blogging. Anyway, one of her posts which has always caught our eye is on mars bar melts which look deliciously sinful, so Jossi and I decided to give them a whirl.


Ours turned out to be scrumptious and the use of cake mix instead of cookie dough added an almost surprising twist- despite the fact we'd whisked up the cake batter, we still expect something much more like a cookie to come out of the oven! Maybe that was a little dim on our part?


But how do these compare to a mars bar cookie? Well, since we made our cookies from scratch, they were marginally more time consuming. Here's how we made them:


Ingredients:
one egg
120g butter
220g of fine brown sugar (caster will do if you don't have this)
200g self raising flour
two mars bars
4 or 5 marshmallows (okay we cheated a little and added these in as well...)
A pinch of salt


Very simply bung all of the ingredients into a bowl and mix. You may find it helpful to rip the marshmallows into small pieces and to chop the mars bars quite finely. When they're all incorporated, take small amounts of the dough and flatten it into cookie shapes, then pop them on a baking tray (set them a bit further apart than we did!). Put the tray in oven for about 15 mins at 180°.  Ta-da! You're done!

Okay okay, ours really aren't that pretty, but they tasted amaziiinng!


I have to admit, I'm rather more of a cookie fan- I like the subtle crunch you get when your teeth sink through one and the way they're slightly more on the chewy side than cake. The ones Joss and I baked where truly magical, if rather irregular looking. However, that's not to say I don't like the 'Mars Bar Melts' and they were definitely appreciated by my little sister when I delivered her some this weekend!


Cookies are always better with hot chocolate!


*Slurp*


We had loads of spare mixture and decided to get inventive, so we may have combined the two mixtures together and baked a cookie-melt hybrid. These were absolutely fab and definitely worth a try!